
A combination of a weekend children's party (with a store-bought card!) and The Princess and the Pea by Lauren Child and Polly Borland inspired this project.

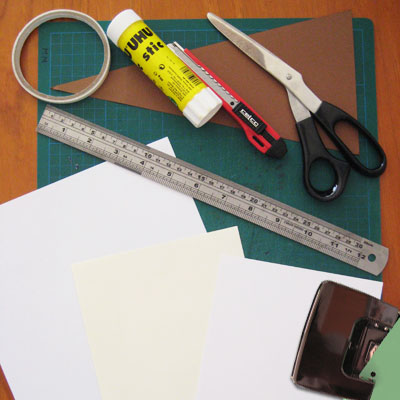
What you need:
- Scissors or a craft knife
- Glue
- Double-sided tape
- Metal ruler
- 2 sheets of paper (these will be for the princess and mattresses so you might want to use textured paper or just plain white is okay, too)
- 1 sheet A5 card
- Coloured cardboard (for bed frame, I used pennant leftover from a DIY party bunting)
- Green paper or board
- Hole punch
- Cutting mat
- Free template download here
- A picture of a princess – select your own princess from my illustrated Princess pack here
- 12 Decorative paper scraps or printable – prints used in this tutorial can be downloaded here
Step 1
If you are not using scrap paper or existing paper, print out your preferred designs. By using digital prints you can shrink each print and size so all fit on one sheet of paper.
Design tip: I used Adobe Illustrator to shrink and place the digital swatches for the mattresses

Step 2
Cut out mattress, bed frame and princess sheet. Trace mattress to the back of the your pattern sheet or your scraps of paper. Tracing on the back just saves time erasing any pencil marks. Cut out bed frame.
Craft tip: when tracing the mattress template, you can tilt it and flip it around. The beauty of this design is that it doesn't have to be exactly the same shape nor strictly horizontal.

Step 3
Arrange mattresses in the order with which you're happy and hole punch green card for pea. Split pea in half.


Craft tip: paste bottom mattress then paste the bed frame over it. This will provide an easy vertical guide when pasting the other mattresses.
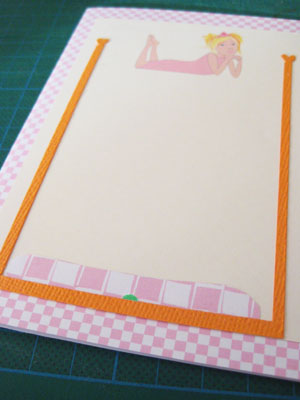
Step 5: Finish your card
Glue or stick the princess paper onto the backing card and you're done!Craft tip: If the paper stock isn't very fibrous I always opt for double-sided tape. It makes things sit flat quickly unlike glue which takes time to dry and may warp your paper.
 |
| 2 finished cards Background: The Princess and The Pea by Lauren Child |
If you want to give it a try, you can download the pdf template here.
Also, you might want to check out a brief free tutorial on how to create a matching A6 envelope here.
No comments:
Post a Comment